- Published on
Kobo Nia with Vario - Glide Computer
- Authors

- Name
- Zohaib Rauf
- @zabirauf
I got my glider rating in October 2021 and in 2022 my goal is to learn more about soaring and get better at it. I recently started flying more at my local soaring club and as I get checked out in gliders I want to use a glide computer for both navigation and starting some cross country (XC) soaring.
XCSoar is a well known and Open Source glider computer. It is supported on multiple platforms but iOS is not one of them. Along with being supported on Android, it's also supported on certain Kobo e-ink readers. The advantage of Kobo is that it has a better battery, works well in direct sunlight. The cons are that it doesn't have a colored screen and will be slower than an Android tablet or phone. Another aspect is that Kobo itself doesn't have GPS, Baro etc. (standard on Android devices) so I would need to have another device that feeds all that info into Kobo.
Blyefly Vario is a device I found which provides the GPS, Pressure sensor, Variometer and a small speaker. Connecting this with Kobo will make the whole thing a self contained device that you can easily take from one club ship to another.
Bill of materials
I used Kobo Nia for this as its cost was $100 and it's a newer e-device which means it will have a better processor, good resolution. Though Kobo Nia is not officially supported by the XCSoar but unofficially it works with certain version.
I got the BlueFly TTL GPS version which works with the Kobo Nia and it cost approx. $75 USD ($105 AUD as its shipped from Australia).
The BlueFly needs to be soldered to Kobo so you need a soldering iron and some soldering skills. I also designed a 3D printed case to hold both of them together so if you have a 3D printer laying around you can also print that. The case isn't yet designed to be mounted, I'm working on a solution for that. Alternatively you can always hot glue BlueFly directly to your Kobo.
1. Backup Kobo and install XCSoar
Kobo Nia comes with an 8GB MicroSD memory card but it's not directly accessible. The reason you should backup the SD card is because you will be installing XCSoar and if something goes wrong, you can always flash the SD card to its factory state and recover. I made the mistake of not doing it and I ran into a problem, which gladly I was able to get out of, but momentarily I was in a panic thinking my newly bought $100 Kobo may be a paperweight.
You would need to open the Kobo Nia to access the memory card. You can open Kobo Nia by first running something thin or your nails alongside the back case which should loosen it up. Then you can use some small flat screwdriver to open it by running it along the edge of the case and popping it up. First time it may take some time so be patient and don't try to force it to open.
Once you have the case open, disconnect the power cable so you don't short anything. After that you can pull the SD card out. The SD card has some glue so you may need to shimmy it to loosen up and then take out.
Connect the SD card to your computer and use Win32DiskImager to create the image
- Open Win32DiskImager
- Enter the path where you want to create the image but suffix it with kobo-nia.img.
- Then click on Read which will read whatever is on that SD card and then store it in that file.
Once you have backed it up, you can install XCSoar on it. You should use the XCSoar 6.8.11 version as when I tried the latest version 7.23, the touch screen didn't work so I couldn't do anything. You can download XCSoar 6.8.11 from here. Once you downloaded the KoboRoot.tgz, then go to the SD card that you took out of Kobo and find the folder .kobo and place the KoboRoot.tgz in that folder.
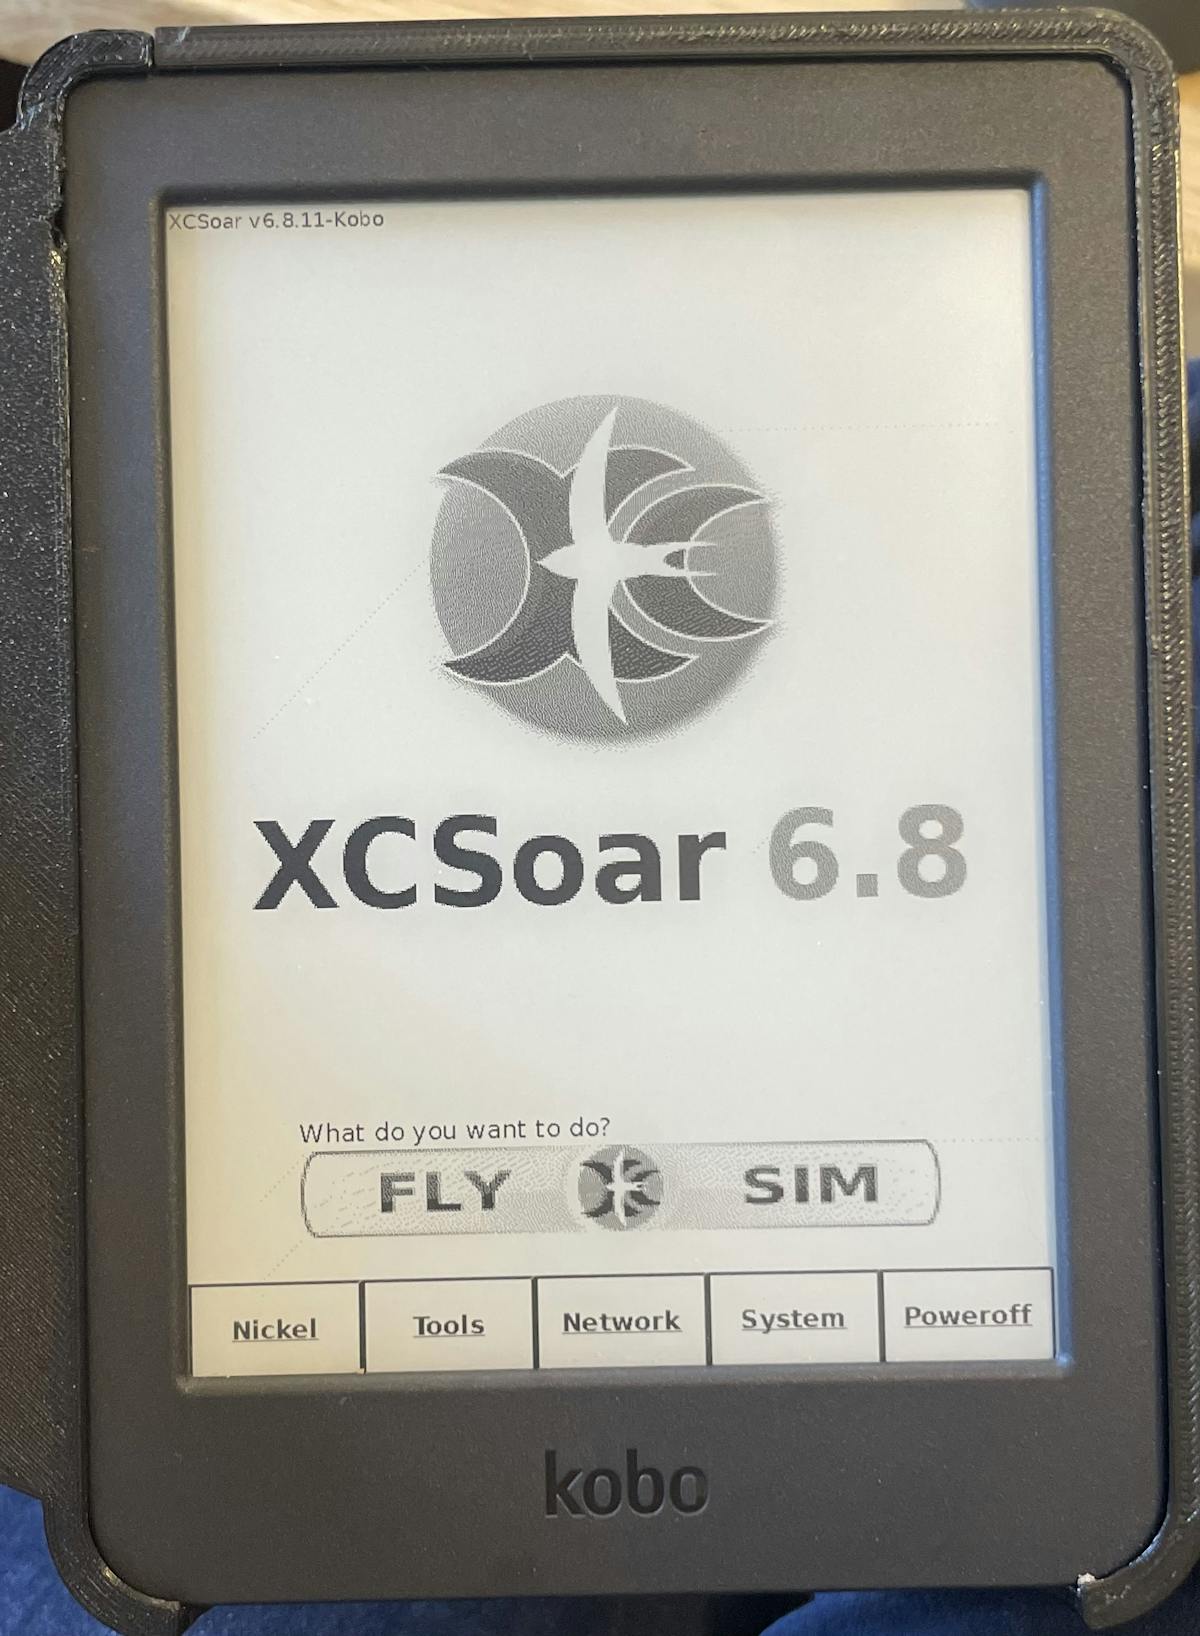
The final step is to eject the SD card and put the SD card back, plugin battery cable and power it up. This will install XCSoar and when you power on it will land you on the following screen.

You can use the Nickel to go back to the original Kobo Nia e-book software. That would also be handy when next time you have to access the SD card without opening the back cover, for putting maps, waypoints and other files for XCSoar.
2. Soldering BlueFly Vario
Make sure the battery cable is popped off before you do anything. If this is the first time you are soldering, get some practice on some wires to a broken circuit. The BlueFly Vario has the following layout
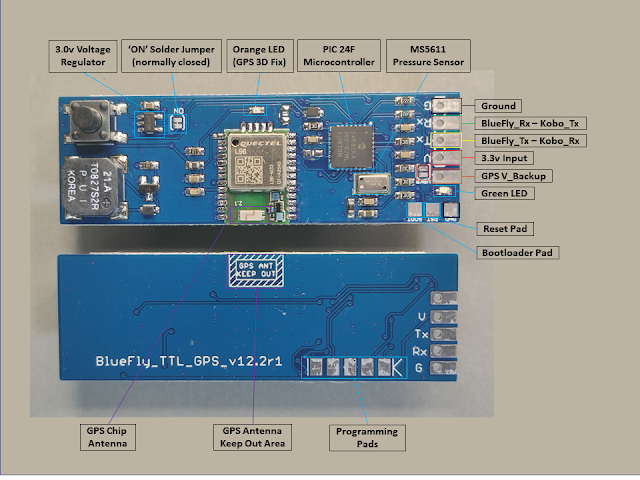
The BlueFly Vario has the Serial Input/Output connectors which will connect to Kobo Nia connectors. When you open Kobo Nia these connectors will be on the back right side. The layout of the connection should be as in table. Make sure that Rx from one device goes to Tx on the other device and vice versa. Rx is receiver and Tx transmission, hence transmitted data from one device will go to receiving end of the other. For the Ground wire from BlueFly vario, instead of connecting directly to Kobo, I connected that to one of the screw which is also ground.
| BlueFly Vario | Kobo Nia |
|---|---|
| V | V |
| Rx | Tx |
| Tx | Rx |
| G | Screw |
Once you have them soldered, make sure the solder doesn't connect to the ones next to it. You can see the explanation in the video at 4m 8s mark.
Once you have this connected, you can power the Kobo Nia on and if you hear the beeps that means the device has been setup.
3. Setting up XCSoar
Once you have the BlueFly connected, you can start setting up the XCSoar so you can use BlueFly, download maps etc. Once you boot up, go to Fly mode.
3.1. BlueFly setup
- Click on the M button
- Go to Config
- Go to Devices
- Edit device A
- Set port to ttymxc0
- Set baud rate to 115200
- Set driver to BlueFly Vario
- Press OK
Now you can verify that the device is working fine by selecting the device and tapping on Monitor which should show the data coming from BlueFly vario.
Once you have BlueFly ready, you want to also control various settings directly from XCSoar. The good thing is that XCSoar provides a way to add new buttons but it needs to be defined in a config file that you need to transfer from your computer.
- You can start with the config file here by downloading it or you can use this tool to easily create a new config file based on your specific needs.
- Connect Kobo with USB to your computer
- When you boot up, select Nickel so the device and SD card shows up in your computer
- Go to XCSoarData in the SD card
- Place the data in that folder
If you want to modify what the buttons do, you can look at the BlueFly manual to find the commands and change/add buttons to send those commands.
3.2 Add Maps
XCSoar by default doesn't come with any map or airspace information. You would need to generate and add all that data.
The map you generate shouldn't be very large (i.e. not the whole of USA) as that will make loading XCSoar so slow that it may not be practically usable. Generally keep it to the state or region you are flying. You can generate multiple maps, put all of them on the device and then select later which you want to use.
- Go to XCSoar map generator
- Follow the instructions to generate the map for the region you want. I generally select the 'High resolution terrain'
- Wait for the file to be generated and then download it
- Connect Kobo with USB to your computer
- When you boot up, select Nickel so the device and SD card shows up in your computer
- Go to XCSoarData in the SD card and create x.Maps folder
- Place the downloaded data in that folder
When you are boot XCSoar, you can select the map you want to use
- Click on the M button
- Go to Config
- Go to System
- Select Site Files
- Select Map database
- Select the file you placed
3.3 Add Airspace
When soaring along with airspace information you may also need the latest TFRs so you don't violate them. You can use soaringdata.info to generate various airspace data and use on XCSoar, including TFRs. Where there is option of file type use the OpenAir (.TXT).
- Have the airspace data ready
- Connect Kobo with USB to your computer
- When you boot up, select Nickel so the device and SD card shows up in your computer
- Go to XCSoarData in the SD card and create y.Airspace folder
- Place the data in that folder
When you are boot XCSoar, you can select the airspace you want to use
- Click on the M button
- Go to Config
- Go to System
- Select Site Files
- Check the Expert mode
- Select Airspaces
- Select the airspace file you placed
- (Optional) You can also select More airspaces to select another airspace file
3.4 Add waypoints
- Have the .cup waypoint file ready
- Connect Kobo with USB to your computer
- When you boot up, select Nickel so the device and SD card shows up in your computer
- Go to XCSoarData in the SD card and create z.Waypoints folder
- Place the data in that folder
When you are boot XCSoar, you can select the map you want to use
- Click on the M button
- Go to Config
- Go to System
- Select Site Files
- Select Waypoints
- Select the file you placed
(Optional) 3D case
I also wanted to put the Kobo and BlueFly vario into a case so I designed one that you can 3D print. You can download the models here and see the instructions on the Thingiverse.
